GiantDojoALPHAv0.01
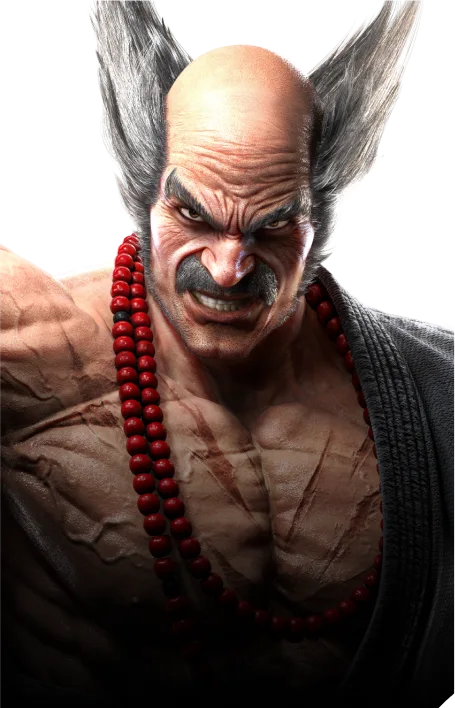
Heihachi

Heihachi

Heihachi - mishima/pressure. Tools include i12 launcher, CH-launch low.

mishimapressure

Key Moves

df+1

Mid attack to check situations. df+1,1 can be used to check sidestepping opponents while df+1:2 can be charged and is useful for pressure.

f+4

Useful button to pressure opponents at the wall. It allows you some follow-ups on counterhit and when it hits crouching opponents. You can shift to FUJ stance by pressing down.

b+4

Your main tool to fish for counterhits. Careful not to whiff.

fthenf+2

A risky launcher that is useful to hit grounded opponents.

f+3~D

Long range mid that can shift to FUJ stance. It doesn't give you advantage on block, so it's a good idea to cancel the stance by pressing DF~B if you don't wanna gamble with a stance option.

db+2 db+3

Low options to chip at the opponent's health.

fthennthendthendf+4

Heihachi's hellsweep has many different follow-ups The single hit is a good button to pressure opponents and leads to a combo on counterhit.

EWGF

A high launching attack with many applications in the neutral It's important for punishment, but can be used for approach and as a keepout button. Don't neglect it.

Overview

TBD

Strengths

TBD

Weaknesses

TBD

Game Plan

TBD

Heat

TBD

Defense

TBD

Punish guide

How to beat them. The Frame Data tab in Punish mode shows per-move counter hints; the sections below are pulled straight from this character’s frame data so you can drill specific punishes.

Punish on block

Launch on block (-15 or worse, use your i15 launcher):

  • FC.df+4 -23 on block (low)
  • f,n,d,DF+3 -23 on block (low)
  • f,n,d,DF+4 -23 on block (low)
  • RAI.4 -23 on block (low)
  • db+2 -18 on block (low)
  • R.df+1+2 -18 on block

Standing string punish (-14 to -13, df+2 / i14 launcher):

  • f+1+2 -14 on block
  • FC.df+2 -14 on block
  • ws1 -14 on block
  • FUJ.4 -14 on block
  • WAR.f,n,d,DF+4 -14 on block
  • OTG.d+4 -14 on block

Jab punish (-12 to -10, fast string starter):

  • 4~3 -11a on block
  • f+2~1 -11 on block
  • b+1+2 -11 on block
  • ws3 -11 on block
  • f,n,d,df#1 -11 on block
  • f,n,df#1 -11 on block

Duck these highs

Every high in Tekken loses to a crouch, but these are the ones worth committing to:

  • 4* (i24, high, +6 on block, launcher)
  • f,n,d,df+2 (i11, high, -10 on block, launcher)
  • f,n,d,df#2 (i11, high, +5 on block, launcher)
  • f,f,F+1+2 (i15, high, +3 on block)

Step their linear strings

The data doesn’t flag specific step weaknesses for Heihachi. As a default, sidestep-left against right-hand attacks (2, df+2 style) and sidestep-right against left-hand attacks; their homing moves (if any) are listed under Key Moves.

General notes

  • Block low and wait. Lows in the data without a CH launch (above) give frames but no combo.

Stance handling

Heihachi threatens these named stances. Each block shows the launcher, mid, low, and any options that are negative enough to punish on block.

FUJ (7 moves):

  • Launcher: FUJ.2 (i15, mid, -10 on block, launcher)
  • Mid threat: FUJ.3 (i28, mid, -10 on block)
  • Low option: FUJ.4 (i18, low, -14 on block)
  • Punishable on block: FUJ.4 (i18, low, -14 on block); FUJ.1+2 (i18, mid, -13 on block); FUJ.2 (i15, mid, -10 on block, launcher)

WAR (7 moves):

  • Launcher: WAR.1+2 (i12, mid, -10 on block, launcher)
  • Mid threat: WAR.f,F+3 (i20, mid, +1c on block, launcher)
  • Low option: WAR.f,n,d,DF+4 (i16, low, -14 on block, CH launch low)
  • Punishable on block: WAR.f,F+2 (i19, mid, -16 on block, launcher); WAR.f,n,d,DF+4 (i16, low, -14 on block, CH launch low); WAR.1+2 (i12, mid, -10 on block, launcher)

RAI (5 moves):

  • Launcher: RAI.2 (i17, high, +10 on block, launcher)
  • Mid threat: RAI.3 (i22, mid, -7 on block)
  • Low option: RAI.4 (i19, low, -23 on block, CH launch low)
  • Punishable on block: RAI.4 (i19, low, -23 on block, CH launch low); RAI.1 (i17, mid, -11 on block)